Ham Bone Part 3
Slicing the meat off in useful slices
Trust me, it really does get easier after a few times - and the money saving is sooo worth it...
Money Saving Idea - use ham slices for Breakfast BACON (see end photos)
I do this straight after taking off outer rind shown in Part One.
You will need:
- A cutting board, sharp knife – a paring knife is ideal.
- Something put meat slices in.
- And a cup of coffee
A Coffee is my necessary addition to any procedure – you please yourself J
Here we go...
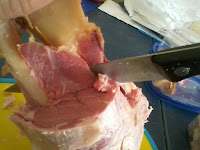
1. Make a downward cut to the bone
- do this on both sides.
*** Note - Always slice AWAY from your HAND ***
You do not want to loose a finger in the process!
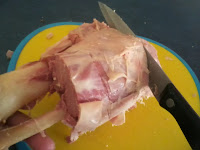
2. Hold bone and slice across to the first downward slice.
The slice should come away cleanly and easily.
** Note - Don't make the slices too thin or too thick -
Medium slices are easier to achieve and more versatile.
3. See, you get decent sized slices from this ham bone...
4. Keep slicing across until you get down to the bone.
Great - you are about half way done!
Not as bad as you thought, right. Great job!
5. Nice slices already and more to come yet.
Now you can see why this worth it.
Let's crack on and get the rest done,
Sip of coffee and we're away again.
6. Now you will notice meat between the two bones -
and there is a simple way to harvest it.
7. Hold the bone firmly.
Slice down the inside of one bone.
8. Now slice down the inside of the second bone,
run the knife across at the end to meet the first bone,
then remove the slice.
9. Your Ham bone should now look like this.
Yay half way, already !
I do this straight after taking off outer rind shown in Part One.
You will need:
- A cutting board, sharp knife – a paring knife is ideal.
- Something put meat slices in.
- And a cup of coffee
Here we go...
1. Make a downward cut to the bone
- do this on both sides.
*** Note - Always slice AWAY from your HAND *** - do this on both sides.
You do not want to loose a finger in the process!
2. Hold bone and slice across to the first downward slice.
The slice should come away cleanly and easily.
** Note - Don't make the slices too thin or too thick -
Medium slices are easier to achieve and more versatile.
3. See, you get decent sized slices from this ham bone...
4. Keep slicing across until you get down to the bone.
Great - you are about half way done!
Not as bad as you thought, right. Great job!
5. Nice slices already and more to come yet.
Now you can see why this worth it.
Let's crack on and get the rest done,
Sip of coffee and we're away again.
6. Now you will notice meat between the two bones -
and there is a simple way to harvest it.
7. Hold the bone firmly.
Slice down the inside of one bone.
Slice down the inside of one bone.
8. Now slice down the inside of the second bone,
run the knife across at the end to meet the first bone,
then remove the slice.
run the knife across at the end to meet the first bone,
then remove the slice.
9. Your Ham bone should now look like this.
Yay half way, already !
Yay half way, already !
Now to tackle the other half. It's really a repeat of the first 4 steps...
So...make a downward cut to the bone.
Make the first slice across - same procedure as before.
Sometimes the first slice goes al the way across.
This is all good as it results in a bigger slice.
This is all good as it results in a bigger slice.
Continue cutting off slices until you reach the bone.
Turn the bone over and repeat on the opposite side.
Continue until you have all the slices off the Ham Bone.
Getting that meat from between the bones.
Place the knife between the two bones,
slice down the inner sides of both bones
until you get most of the meat off.
slice down the inner sides of both bones
until you get most of the meat off.
The stripped Ham Bone will look something like this.
You may like to trim off some smaller bits as well
- that is entirely up to you.
The stripped ham bone - with smaller bits trimmed off.
I use those smaller bits too so I take them off.
Wrap the Ham Bone in plastic, store it in the freezer
- there is still plenty of flavour in the bone.
Use for stock, soups, casseroles for a bacon flavour.
Waste not ~ want not J
Storing the ham slices:
depends on how you want to use them.
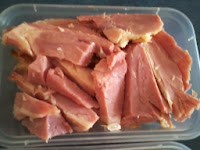
PLASTIC CONTAINERS: get cheap ones from the $2 shop - I use them all the time.
Slices - medium size:
Use for sandwiches, salads, omelettes.
Use for sandwiches, salads, omelettes.
I use these like best cured bacon!
Its cooked, not raw!
Just heat it through and it's good to go.
Just heat it through and it's good to go.
Remember these slices come from a $3.00 ham bone
All these containers:
1 x container Fatty bits for dog food
2 x containers Medium slices - a variety of uses
1 x container of small bits
- I use in sauces, add to fried onions
- I use in sauces, add to fried onions
- anywhere I would use bacon bits.
Works great in Macaroni Cheese!
Works great in Macaroni Cheese!
non-stick PLASTIC WRAP: ( works with Baking Paper too!)
This is what I do...Why?
Not everyone wants breakfast at the same time.
Not everyone wants a cooked breakfast.
Divide Medium slices into 1 - 2 person Portions.
Have smaller portions in the freezer.
For a leisurely breakfast on Days Off
For a leisurely breakfast on Days Off
1. Cut the wrap to size.
Lay the slices in a row on one side of wrap.
Lay the slices in a row on one side of wrap.
2. Fold over the other side covering the pieces,
tuck underneath.
tuck underneath.
3. Fold up the wrapped ham - it takes up less room.
The wrap keeps the slices separate
- easier at the other end when you go to use them!
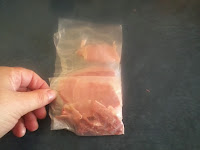
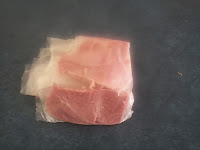
4. A complete breakfast serve bacon bundle
Ready to go into the freezer. Repeat for all.
Portions:
I usually end up with this from a single Ham Bone.
I usually end up with this from a single Ham Bone.
5 x breakfast bundles - large 1-2 person serves
1 x Ham Bone
Not bad for $3.00 !!
5. Storage in the freezer:
Put them into one container.
Put them into one container.
That way they don't ' get lost ' in the freezer and
everyone knows where to find them.
A 400 ml container will hold all 5 bundles.
The ham bone goes separate - easy to recognize.
why not, NO RIND = NO WASTE !!!
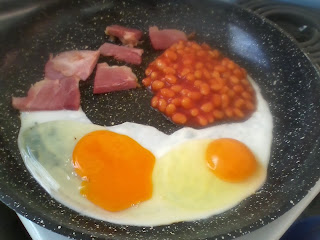
6. Get the pan hot
- remember this is Ham - it's already cooked
- remember this is Ham - it's already cooked
It just needs heating through.
Brown for a few minutes on both sides.
It smells absolutely delicious!
It smells absolutely delicious!
Place the browned ham slices to one side
Add the eggs.
Add the eggs.
Yeah, I know, a yolk broke
- it happens my husband has to get over it.
- it happens my husband has to get over it.
We don't waste eggs in our house
- if the yolk breaks, tough - eat it!
- if the yolk breaks, tough - eat it!
Seems to be a Male thing because most guys love em.
I like baked beans, but not first thing in the morning! But that's me...
A cooked breakfast for around $2.00 = BRILLIANT VALUE!!
* eggs x 2 ( $3.50 ÷ 12 = 30) 0.60 ¢
* baked beans x 3 tbl ($2.09 420g can) = 0.50¢
* ham x 1 bundle ($3.00 ÷ 5 = 60) 0.60 ¢










No comments:
Post a Comment